Adapting
My “day job” has been particularly hectic lately and, if I’m honest, I’m worn out. On the one hand, I’m thankful to be busy. I don’t actually like having much down time at the office. On the flip side, there are days when I feel like I’m barely keeping up. Have you ever had one of those weeks where you don’t even feel like you have time for a bathroom break? That’s where I’m at. While we’re all tired of the phrase “new normal”, that is exactly what I’m adapting to. I’m viewing it as a learning curve. Added tasks to the day-to-day are really just a matter of time management. I’m learning how to multitask and prioritize in new ways. Once I get the hang of it, I’m sure I’ll be even more efficient than ever.
All Hand On Deck
When work gets crazy, my time at home becomes even more valuable. The last thing I want is more work as we get home from work and school. Yes, chores need to be done and meals need to be cooked but I still want to have time to relax with my family. We accomplish this in two ways. First off, we all pitch in on the chores. Even our four year old can help empty the dish washer or toss laundry in the wash. Secondly, we are intentional about choosing easy to cook meals. My husband and I take turns with meal planning and cooking. Weeknight meals are typically just a simple protein with a vegetable of some sort as the side dish. My husband tends to grill and I tend to do sheet pan dinners or slow cooker meals. Once again, our daughter helps out where she can. She might help season the vegetables or she might just set the table for us.

Shredded Chicken Tacos (a slow cooker meal)
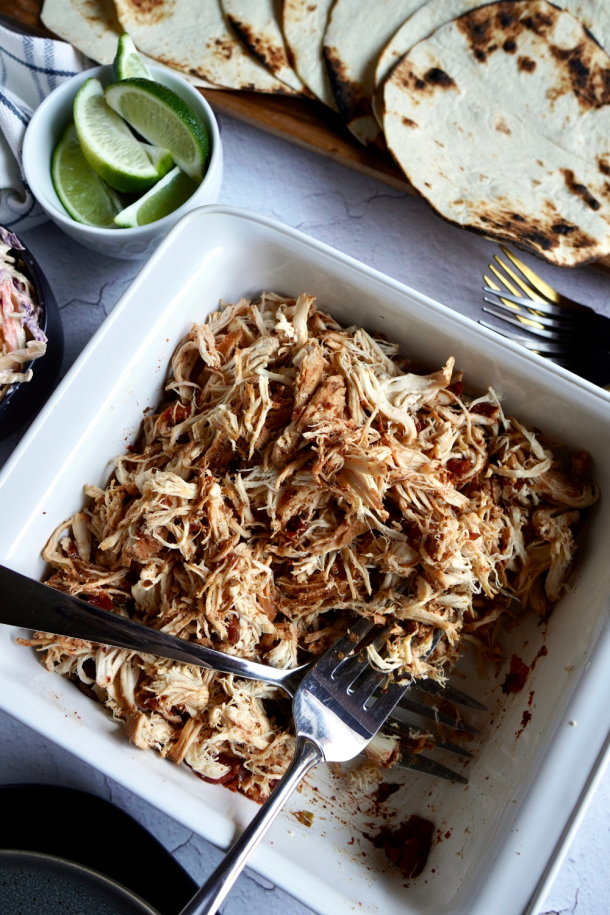
As I’ve been exploring more slow cooker meals, I remembered a recipe my brother and sister-in-law used to make for shredded pork. I’ve adapted the recipe into my own shredded chicken tacos by using my usual taco seasonings. I also opted for chicken as we are more likely to have that on hand in our freezer. I’ve been making this on the weekends so that I can have leftovers for lunch during the week. This shredded chicken is delicious in tacos (as I’ve written it up here) but it is really more versatile than that. You could put it on a baked potato, in sandwiches, on nachos, or make a rice bowl with it. Frankly, it is even tasty on its own, cold or warm. I’m excited to see what you end up doing with this recipe.

Shredded Chicken Tacos
Equipment
- Slow Cooker
Ingredients
- 2 lb boneless, skinless chicken breast
- 10oz can Rotel
- juice of 1 lime
- 1 teaspoon salt
- ½ teaspoon ground black pepper
- 2 teaspoons ground cumin
- 2 teaspoons garlic powder
- 1½ teaspoons paprika
- 1½ teaspoons chili powder
- 12 tortillas
- Optional toppings: spicy cole slaw (see next recipe), avocado, sour cream, cilantro
Instructions
- Place chicken in bottom of slow cooker then top with rotel, lime juice, and all spices.
- Cook on high for 4 hours or until chicken is cooked through and easily starts to pull apart.
- Move chicken from slow cooker to a large serving dish (keeping as much of the rotel and seasoning on it as possible) and shred with two large forks.
- Serve in tortillas with desired toppings.

Spicy Coleslaw
Ingredients
- 7oz shredded cabbage or coleslaw blend
- 5oz plain greek yogurt
- 2 teaspoons sriracha (more or less depending on how hot you want it)
- juice of ½ lime
- ¼ teaspoon garlic powder
- ¼ teaspoon salt
Instructions
- Stir all ingredients together in a small mixing bowl until cabbage is evenly coated.
- Serve on shredded chicken tacos.