
Last week we had family in town for Easter. I had every intention of cooking a couple of vegetarian dinners but ultimately did not cook one single meal at home. I have no regrets though! Ultimately, the time I would have spent cutting vegetables or creating a sauce was spent having amazing conversations. I love cooking but I love quality time with family even more.

A couple of days before our guests arrived, I made these nut bars. I am definitely a grab and go breakfast kind of person. Even as a child, I did not eat a big breakfast. I’m so glad I had these on hand because they provided all of us with a quick, light breakfast or snack when we needed it. You’ll notice that there isn’t any fruit or chocolate in this recipe. It is so hard to find a granola or nut bar without these ingredients which is why I decided to create one of my own. If I really want chocolate, I’ll go grab a cookie. For a light, grab-and-go breakfast, I’ll stick with these nut bars.

Tips:
- A candy thermometer is recommended for getting the honey to temperature. However, you can also let it get to a rolling boil and then drop a small amount of the hot liquid into a cold cup of water. The honey should become firm and when you pinch it with your fingers it should have very little give.
- If you aren’t a fan of almonds or macadamia nuts, feel free to sub out for your favorite combination, just keep the measurement ratios the same as what is given in the recipe.

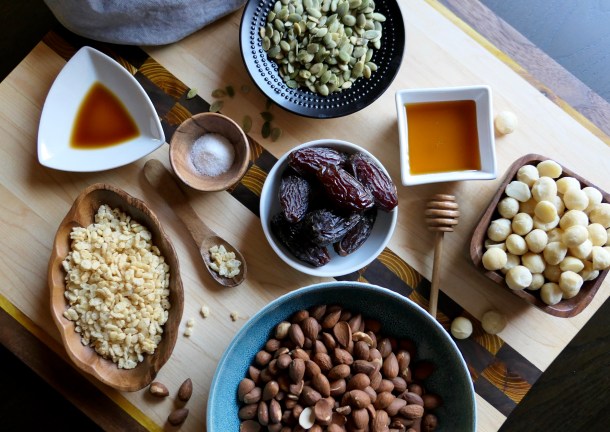
Honey Date Nut Bars
Makes 12 bars
2 cups roasted, unsalted almonds
1 cup roasted, unsalted macadamia nuts, broken into large pieces
3 pitted medjool dates, chopped
½ teaspoon salt
1 teaspoon vanilla extract
1/2 cup honey
1/4 cup pepitas
2/3 cup crispy rice cereal
Directions:
Put almonds, macadamia nuts, pepitas, dates, rice cereal and salt into large bowl and set aside.
In a medium sauce pan, bring honey and vanilla to a rolling boil, stirring constantly until you reach 300°F.
Pour hot honey mixture over nut mixture, stirring to quickly mix the two.
Spread nut mixture evenly over parchment paper lined 9×9 pan. Let cool completely before cutting and serving.


These look just as good as the bars you’d buy in the store–but undoubtedly a lot healthier.
Thank you! There certainly is a level of satisfaction in knowing exactly what has gone into my snack bars.